
This interface used the same set of shapes or figues we used for interface 01 but this time the inside curve played a bigger part for determining the shape of the interface.  Figure 01  Figure 02 Figure 3 illustrates the map of the different figures in place. I used 3 circles this time to create a socket for some 3D spheres. I also used a longer inside curve and a shorter bar. Using the same set of figures we were able to come up with a different design. Part of the design process is being able to be creative with what you have and what you know. 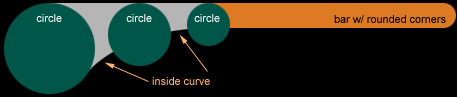 Figure 03  Figure 04 The process to create the inside curve is the same with interface 01. Figure 04 shows the position of the rectangular area, figure 05 shows how the circular selection is positioned with the red circle indicating the where the selection touches the edge of one of the circles. The other end of the curve is covered by one of the circles so we dont have to worry about that end. 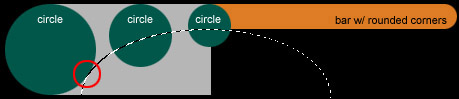 Figure 05 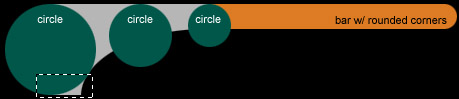 Figure 06 Don't forget to remove the excess sections of the curve before you merge all of different parts of the interface. Don't forget to practice too.
|


