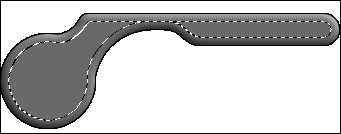
 |
This tutorials is great for integrating
design elements like buttons, bars and other objects into your interfaces.
The technique is very simple and makes use of the cornering technique and
the contract selection option of Photoshop. |
 |
You will first need to have the main interface. Once you have
that ready, you start by loading a selection around |
the interface.
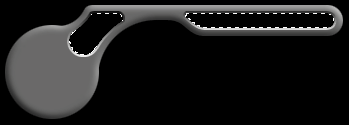
Contract the selection. The amount you need to contract
depends on the size of the slot you want to create.
For this tutorial I used 6 as the amount of contraction. |
|
 |
 |
 |
With the selection still loaded, make a new layer and fill
the selection with black color. You can use any color for |
| this step since it will only be temporary. |
|
 |
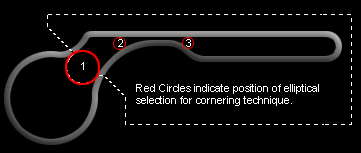
I then choose a particular area of my newly created pattern
then I apply the 3 rounded corners using my |
cornering technique. This step will determine
the shape of the embed effect. This is also a tricky part and proper
positioning of the elliptical selection
is important to get a clean cut for the corners. Try to zoom in the
key areas to make sure you have the cut right.
The numbering in the circles is to represent which order I did the
rounded corners. |
|
 |
 |
 |
After doing the cornering I then make a selection on each
new pattern I made. I then apply a vertical gradient |
using the darker
and lighter shade of the base
interface color.
Since grey is the primary color I then chose black/dark grey and white/light
grey as my colors for my vertical gradient. This step should create
the embed / inset 3d effect for the slot. |
|
 |
After applying the gradients for all of the patterns, load
a selection all patterns. Contract the selection
by 2 pixels |
then make a new layer using the current selection.
The amount of pixels you need to contract will depend on how much
emphasis you want to give on the gradient fill.
After contracting the selection just fill the pattern
with black an you're done. |
|
 |
|
|
Go
Back  |


