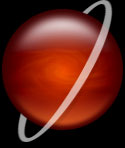
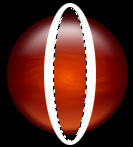
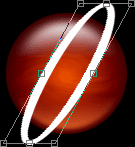
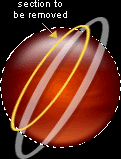
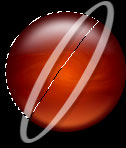
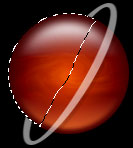
Here is an add on effect for your 3D spheres. This technique is another easy to execute effect. It makes use of the transform option and the subtract selection feature which you use with the marquee tool while holding the alt key.

First you need to create the orbit. To do this I created an oblique selection using the elliptical marquee. I then filled my selection with chosen color for the orbit.

I then made another oblique selection which is similar than the first. I will use this new selection by hitting the delete key to cut the inside of the pattern and create the orbit.

Use the edit > transform > distort option to tilt the orbit diagonally by clicking on the upper line that forms the box and drag it sideways. You can then add
the other effects for the orbit after you have altered its perspective.

After slanting the orbit, place the orbit in its proper position above the sphere.


You then need to merge the layers that go with the orbit (layers with the effects for the orbit. E.g. drop shadow)

We then need to remove a section of the orbit to create the illusion that the orbit is wrapped around the sphere.

After you merged the layers, go to the sphere layer, load a selection on the sphere and then go back to the orbit layer.


Use the lasso Tool while holding the alt key to subtract from the selection made by the sphere. Once you only have the selection
for the are to be removed you can then hit the delete key to remove that section.

tutorial_orbit.zip
Download PSD file of this tutorial.
Go Back


Images and content Copyright © 1998-2001 Ryan Lacdao
Bandwidth by Philmetro