


|
|
||||
| |
|||||
|
|||||

 |
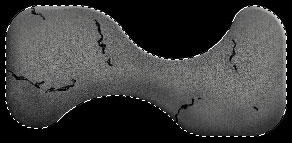
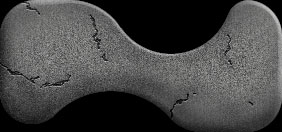
Creating cracks on the surface of the your interfaces is another technique you can use to produce the wear and tear effect for your designs. The technique is easy to execute and makes use of the softlight effect to create the realistic crack on the surface. |
|
 |
||||
 |
Select the duplicate layer then offset the contents of the layer 1 pixel down and 1 pixel left. Inverse the color of the black pattern to white.This will create the 3D effect for the crack to make it appear more realistic. |
Now to darken the crack all you will need to do is duplicate the layer containing the black pattern. That duplicate should also be in softlight layer mode. |
  |
|
Go
Back |
|
Images and content Copyright © 1998-2001
Ryan Lacdao Bandwidth by Philmetro |
|
Your Javascript is Turned Off. Please turn
on the Javascript in your browser preferences..
| |||||||||||||||||||||
|
|
||||||||||||||||||||
|
|
||||||||||||||||||||
|
|
||||||||||||||||||||
|
|
||||||||||||||||||||
|
|||||||||||||||||||||