


 |
 |
||||
| |
|||||
 |
|||||

 |
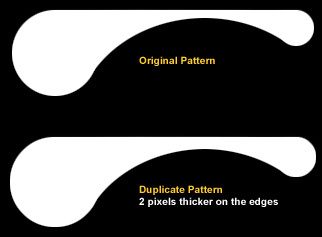
This tutorial features the technique I used for the left and right arms of my front interface for the FxZone. The technique creates a seamless form of two different patterns using different effects for each pattern. |
|
 |
||
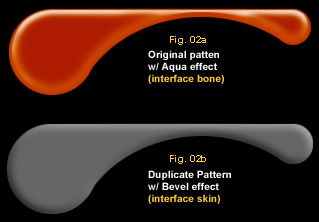 |
I used the aqua affect for my interface bone (fig. 02a) and the 3D bevel effect (fig. 02b) for my interface skin. Make sure the position of the elements and that the order of layers stay the same with the interface skin appearing on top of the interface bone layer. |
|
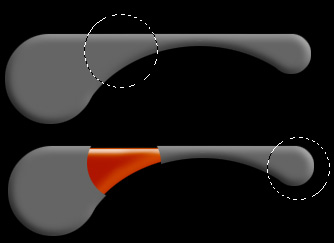
Repeat the process until you are satisfied with the amount of bone layer exposed. |
 |
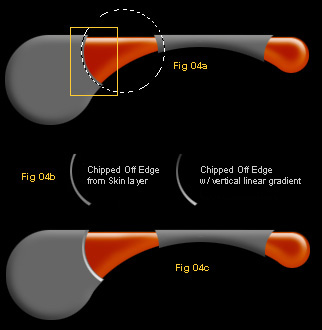 |
Use the elliptical marquee tool to select one of the edges of the interface skin made by the cut outs (fig. 04a). Make sure you have a small portion of the edge selected with the marquee tool. Copy the contents of the selection and paste it on a new layer. Load a selection on the chipped off edge and apply a vertical linear gradient (fig. 04b). The colors for the gradient will be the lighter and darker shade of the base color of the interface skin. I used black and white for the gradient since my base color is dark grey. Once you're done with the gradient move the chipped off edges back to there original position (fig. 04c). Repeat the process for the other edges of the interface skin |
|
|
 |
|
Go
Back |
|
Images and content Copyright © 1998-2001
Ryan Lacdao Bandwidth by Philmetro |
|
Your Javascript is Turned Off. Please turn
on the Javascript in your browser preferences..
| |||||||||||||||||||||
|
|
||||||||||||||||||||
|
|
||||||||||||||||||||
|
|
||||||||||||||||||||
|
|
||||||||||||||||||||
|
|||||||||||||||||||||
|
|||||||||||||||||||||
|
|||||||||||||||||||||